Flameborn Wiki
Planner

Guide

26 stories · 39 notes

The game's own guide pages. You unlock these as you play rather than finding them in the world.

Contents
  1. The Flameborn
  2. The Shroud
  3. The Flame
  4. Landscaping
  5. Building
  6. Survivors And Crafting
  7. Combat
  8. Character Classes And Attributes
  9. Character Skills
  10. The Elixir Wells
  11. The Ancient Spires And Fast Travel
  12. The Ancient Obelisks
  13. Gear
  14. The Glider
  15. The Grappling Hook
  16. Cooking And Food
  17. Comfort And Rest
  18. Resurrection And Lost Items
  19. Lockpicks
  20. The Climbing Walls
  21. Damage
  22. Taming Animals
  23. Happy Villagers
  24. Climate
  25. Fishing
  26. Watering Can

The Flameborn

1 note

On Flameborn

You are a Flameborn, humanity's last beacon of hope. Your inner Flame protects you against the Shroud for a limited time and allows you to venture deep into Embervale.

Vanquish creatures from below, build your empire and reclaim the land!

The Shroud

2 notes

An All Consuming Fog

The Shroud is a ruinous fog that has corrupted nearly all of Embervale. Extended contact with the Shroud is deadly, even for you.

Venturing into the Shroud is dangerous, but rewarding. The treasures and materials found inside the Shroud are rare and valuable.

The Shroud becomes more dense and deadly in later areas of Embervale. A higher Shroud Passage Level is required to pass.

Withstanding The Shroud

Your inner Flame protects you from the Shroud, but not indefinitely. Watch your remaining time whilst enshrouded and leave to recover. When your time runs out, you perish.

Search for glowing hourglass capsules inside the Shroud for a momentary boost and replenishment.
Hourglass capsules are consumed upon interaction to restore 5 minutes of Time in the Shroud but cannot be picked up or carried around.

The Flame

2 notes

Birthright Of The Flame

Your inner Flame illuminates paths, grants access to Ancient Spires and enables Fast Travel.

The Flame can be strengthened at a Flame Altar.

Strengthening The Flame

Upgrading the Flame Altar expands your protection range. Upgrading the Flame Altar requires a Shroud Core. Shroud Cores are acquired by smiting boss enemies.

Sacrifices raise the Flame Level and add a point to all attributes of every Flameborn. They also increase your Shroud Passage Level, which is necessary to pierce the Shroud further. Sacrifices require Sparks. Find Sparks in Flame Sanctums and Flame Shrines.

Landscaping

2 notes

Shaping Embervale

Landscaping inside the base is done with the Construction Hammer.

Outside of the base or building area, you can temporarily shape the environment by using landscaping tools (such as pickaxes) and explosives (to be thrown or detonated at range). Be warned, though: Changes made to the world outside of the building area in your base will be reverted after a while. Changes made inside your building area will remain.

Shape Embervale in any way you'd like by digging tunnels, decimating buildings or piling up hills!

Mining

Precious ores are hidden inside the earth of Embervale. Craft and equip a pickaxe to mine ore nodes.

Different biomes will offer a variety of ores. Progress through the world to encounter better and more advanced materials. More valuable ores can be found beneath the Shroud.

Building

2 notes

Building A Base

Erect a Flame Altar to establish a base. You can craft the Flame Altar in your Manual Crafting tab. Drop the Flame Altar into your hotbar, select it, and place it in the world.

The placed Flame Altar will illuminate the current building range. Here, you can build a shelter for yourself and other survivors. Landscaping inside the building range will remain. Extend the building range by strengthening the Flame at the Flame Altar.

The Construction Hammer And Shelter

You need a Construction Hammer to build shelter.

Craft a Construction Hammer in the Manual Crafting tab. Select the desired blocks and blueprints to build while using the Construction Hammer.

You can craft building blocks at the Workbench.

Survivors And Crafting

3 notes

Gathering Survivors

Survivors allow you to craft more diverse and advanced items. They are vital for improving your equipment, supplies, and storage.

The survivors must be recovered from Ancient Vaults and summoned using a Summoning Staff. The Summoning Staff can be crafted in the Manual Crafting tab.

Crafting Recipes

Survivors may require shelter to unlock crafting recipes. Build shelters for your survivors and craft beds for them!

Additionally, new crafting recipes may be unlocked by gathering key resources. Certain crafting recipes require crafting factories. The factories must be created and placed in the base before use. Key items needed for factories, or the factories themselves, can be aquired on certrain survivor quests.

All known recipes can be reviewed in the Workshops tab in the journal. Important recipes can be pinned.

Crafting Factories

Craft and place a factory in your base to use it. If multiple crafting recipes are available or possible, select the desired recipe in the factory menu at the top with "browse recipes" before crafting.

Select the items needed for processing and place them into the factory inventory. The factory will process the raw materials into higher quality ingredients or items once it receives the correct item input.

Check your factory again after time has passed to retrieve the final product from the factory inventory.

Combat

4 notes

General Combat

In the Inventory (Most Recent Tab) tab, put a weapon in your Action Bar and select it. Press %k to attack.

Press %k to lock onto an enemy. Your camera and attacks will focus on them.

Maneuver behind enemies to backstab them for increased damage.

Unlock more fighting abilities in the skills menu.

Defense

Perform defensive actions to prevent or reduce incoming damage. Most of them cost stamina, so keep an eye on your stamina ring.

Perform a Dodge Roll by pressing %k to evade enemy attacks.

Press %k to block incoming attacks or projectiles while equipped with a shield, ward, or melee weapon. A well-timed block will parry the enemy's attack. To time your parry, wait to see a flashing effect on the enemy weapon or projectile. Enemies that don't carry weapons, like wolves, may show the flash in their eyes instead.

A parry requires no stamina, interrupts the enemy's attack, and fills their stun bar.

Once the stun bar is full, the enemy becomes overpowered and is stunned temporarily.
Ranged And Magical Combat

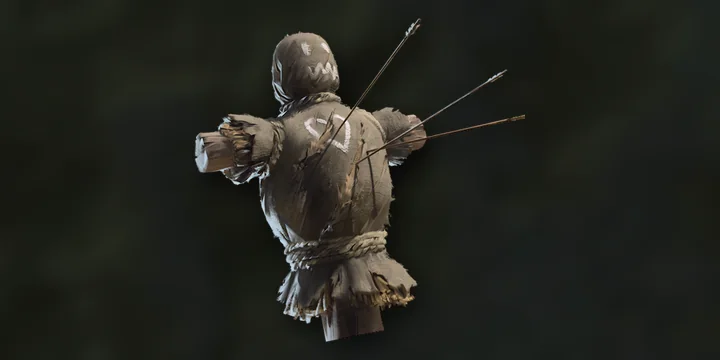
Equip a bow and select ammunition from your inventory to engage in ranged combat. Aim for the head or the enemy's weak spot to do more damage. You can detonate explosives at range with arrows, or throw grenades which detonate on impact.

Equip a staff or wand to unleash magical power. Staves need spell charges as ammunition and require mana to perform powerful attacks. Spells can only be cast with staves.
Wands don't require ammunition, have a short cast time, and refill mana, but are less powerful than staves.

Stealth

You can avoid combat completely by sneaking. Crouch down by pressing %k and enter bushes to remain hidden from the enemy's sight. All bushes hide you.

You can spend skill points to learn the Sneak Attack. Sneak up behind unsuspecting enemies and unleash a Sneak Attack by pressing %k while hidden.

Character Classes And Attributes

2 notes

Character Classes

Select freely from a variety of weapons, skills and armors to choose your own path. You are not restricted by a set of predefined character classes and can craft your adventure according to your own wishes.

Character Attributes

Character attributes can be observed in the character menu. The primary attributes are Constitution for more Health, Spirit which affects Mana, and Endurance which provides Stamina.

Strength affects Melee Damage, Dexterity affects Ranged Damage, and Intelligence relates to Magic Damage.

The character screen lists your resistances, Shroud Passage Level and Time in the Shroud in the Shroud. Hover over the attributes to learn more.

Character Skills

1 note

Unlocking Character Skills

Character skills can be active or passive in nature and must be unlocked from the skills menu. To unlock a skill, select it in the skill tree. Some skills require previous skills to be owned before they can be unlocked. Follow the connections in the skill tree to reach more advanced skills.

To acquire skills, skill points are needed. Gain skill points by leveling up or by vanquishing Shroud Roots.

The Elixir Wells

1 note

Elixir Well Challenges

The Shroud springs forth from Elixir Wells throughout Embervale. Fell the Shroud Root at their depths to receive skillpoints for all nearby Flameborn.

Flameborn who have harvested a Shroud Root once cannot gain additional skill points from the same root after it respawns.

Elixir Wells are always enshrouded and challenging. Prepare yourself accordingly.

The Ancient Spires And Fast Travel

1 note

Discovering Ancient Spires

Scale Ancient Spires and speak to the Flame atop to reveal important landmarks on your map. Ancient Spires unveil the location of Elixir Wells and Flame Sanctums.

They also function as fast travelling points once conquered. Open your map and select the Ancient Spire marker to Fast Travel.

The Ancient Obelisks

1 note

Ancient Obelisk Revelations

Ancient Obelisks contain lore about the world. After reading them, you will gain insight to the locations of hidden Flame Shrines and Shroud Roots.

Flame Shrines can be harvested to obtain Sparks.
Sparks are needed to strengthen the Flame.

Shroud Roots must be destroyed to gain Skill Points.

Gear

2 notes

Gear Durability

Weapons, tools, and torches lose durability over time. Repair your weapons and tools at a workbench to replenish their durability and prevent them from breaking.

Gear Rarity, Salvaging and Perks

Weapons, shields, armors and rings can have different rarities. Salvage them in the inventory to receive Runes. Higher item rarity restores more Runes. Runes can be used by craftspeople and their assistants to enhance weapons, shields, armors and rings.

Gear found beneath the Shroud is exceedingly rare and powerful.

The Glider

1 note

Using The Glider

Gliders must be crafted and equipped before use. To use an equipped Glider, jump off a ledge and press %k mid-fall. Using the Glider requires stamina.

Crafting the Glider requires Shroud Wood. Fell dead trees in the Shroud to obtain Shroud Wood.

The Grappling Hook

1 note

Using The Grappling Hook

The Grappling Hook must be crafted and equipped before use. To use a Grappling Hook, position yourself near an Anchor Point and press %k to zip or swing across. Using the Grappling Hook requires stamina.

Crafting a Grappling Hook requires Metal Scraps. Obtain Metal Scraps from Scavengers.

Cooking And Food

1 note

Campfire Cooking

You can cook food at campfires and cooking stations. Craft a campfire and place it or search for campfires to use. Interact with the campfire to begin the cooking process.

Cooked food provides considerable benefits to health, stamina and mana. Different foods have different effects depending on their food category (meat, vegetable, fruit, etc.).

Comfort And Rest

2 notes

Becoming Rested

In order to rest, one must be sheltered, sitting or sleeping in a safe and warm environment.
The duration of the Rested Buff will charge while resting. While being rested, your stamina and stamina regeneration are improved.

Increasing Comfort Furniture

Furnish your base with Comfort Furniture. A decorated base with higher Comfort Levels will increase the duration of the Rested Buff. As you progress, it will become harder to extend the Rested Buff.

Resurrection And Lost Items

1 note

Death, Resurrection, And Lost Items

As a Flameborn, your immortal soul allows you to resurrect at the last Return Beacon or base after perishing. However, this comes at a cost.

When dying, you will lose items not placed in your hotbar and leave behind a tombstone. Venture to your tombstone to reacquire your lost items. The location of your tombstone will be marked on the map.

Lockpicks

1 note

Picking Locked Doors And Chests

On your journey, you will encounter locked doors and chests. To open them, craft lockpicks in your Manual Crafting tab. Lockpicks will be automatically used upon interacting with a locked door or chest.

Crafting lockpicks requires Metal Scraps.

The Climbing Walls

1 note

Using The Climbing Walls

You can climb walls which are fitted with iron lattices. These Climbing Walls can be found out in the world or in dungeons. Walk up to the Climbing Wall to latch on to the iron lattice.

Climbing requires stamina. When you run out of stamina while climbing, you fall.

Damage

2 notes

Dealing Damage And Damage Types

Weapons deal different types of damage. Damage and ammunition affinities can be viewed when selecting the weapon in the Inventory (Most Recent Tab).

Enemies have susceptibilities to certain damage types. Exploit an enemy's weakness to gain an advantage on the battlefield.

Armor Types

Armor provides protection based on its Armor values.
Each point of Armor reduces incoming damage by 1, up to a maximum of 60% damage reduction. This maximum can be increased with skills.

There are physical and magical Armor types, each matching the incoming damage types.. Check an item’s Armor values in the Inventory (Most Recent Tab).

Taming Animals

1 note

Taming Animals

To tame an animal, earn its trust by feeding and petting it.
Make sure you have food bait the animal likes, approach the animal while sneaking, and throw the bait within their sight. While it is eating, you can sneak closer. Don't move too fast, or you'll scare it away!
Once you are close enough, you can pet it.

Feed and pet the animal a few times to gain its trust. You can then pick it up and bring it to your home.
Provide a nice sleeping place and food to keep it happy and protected from predators.

Your livestock can reproduce if you have at least two happy animals and an extra spare bed.

Happy Villagers

1 note

Finding And Sheltering Villagers

Villagers and crafting assistants can be found all over Embervale. Quests and side stories will lead you to them.

They can reveal more information about the world and guide you to new places, items, and hidden treasures!
Once you've found a villager or crafting assistant, you can place them with a Summoning Staff. Your new followers must have access to food and a sheltered bed to become happy. Happy followers are needed to increase your Flame Level for every upgrade after the first.

A bed is sheltered when it is under a roof and surrounded by enough walls. Assign beds to townsfolk by using the Summoning Staff.

Climate

1 note

Protection Against The Cold And Hypothermia

The Albaneve Summits can get very cold. Snowy areas drain your inner fire, making you lose warmth.

How fast you're drained depends on your frost resistance. You can increase your frost resistance by eating certain foods, equipping warm armor, or being near fire.

When your frost resistance is completely drained, you will suffer from hypothermia. Untreated hypothermia will make you lose health rapidly.

Fishing

1 note

Catching Fish

Throw out the fishing line and wait for a fish to bite. Once a fish bit, quickly press %k to start reeling it in.

Once you have a fish on the hook, you need to reduce the fish's stamina by steering against its movement with %k and %k.
When a segment of its stamina is drained, you can pull the fish closer with %k.
Deplete its stamina before your fishing line breaks!

Watering Can

1 note

What It Can Do

Equip the Watering Can and point at seedlings in your base. It will show you detailed information about your crops:

- Growth Stages — See which growth stage your crop is in, or adjust its maximum growth stage. This can be especially useful for trees if you don't want them to grow too large.

- Suitable Soil — Different crops prefer different soils. The Watering Can lets you see which soil is best suited for each crop. Plant them in the right soil and they'll grow faster!

- Water Level — Some special crops need water to grow at all (this will be mentioned in their seedling description). With the Watering Can you can check whether their water requirement is met — and easily adjust it too.